Even though painting of ceiling is a strenuous procedure that demands experience, expertise and proficiency in getting the paint job done right. It’s a real pain for those who don’t savoir faire the importance of ceiling paint techniques. But believe me, once you understand its importance, it is worth the visual impact. Painting is a self-discovery where every good artist paint what he is and how much creativity and experience he has.
It is the easiest way to make your ceilings look phenomenal and eye-opening. Before you begin with the painting process, make sure you have all the tools and materials necessary for painting. The real painters not only paint the walls, ceilings or rooms, but also paint your dreams with these tools. However, list of products should be broken down according to the preferences and affordable budget.
Tools and Equipment Required for Painting
- Paint brush of high-quality
- Extended roller or roller set
- A paint tray
- Ladder or moveable decorator’s platform
- Clean cloth pieces
- Masking tape
- Natural plant soap
- Biodegradable dust sheets
- Ceiling-specific paint
1 # Purchase the Ceiling Paint
It is recommended to first gather all the tools and the higher-quality paint that is specially prepared for ceiling painting. These types of paints most probably are flat finish latex that give ideal look to your interior ceilings. In fact, matte or flat finish latex is the top choice of every local painting company for the room ceilings. Such types of paints dry slowly and are less likely to slosh.
Pro Tip: Never buy a semi-gloss or high-gloss finish paint for ceilings because they are highly reflective and have negative impact on the overall look of your room and it’s lightning. Semi-gloss or high-gloss finishes are highly reflective.
2 # Prepare Your Room and Ceiling
Clean the room and ceiling surface just before opening the tin of paint. Otherwise, the paint might damage your furniture, carpet and other accessories placed in the room. It is wise to take all the stuff out of the room and then start accessing the edges of ceiling. This enough free space will help you place your step ladder or moveable decorators’ platform in the room.
Once you have cleaned the surface, cover the floors with biodegradable dust sheets to prevent the flooring from being blotched. Moreover, it will also make your movement easier in the room while you are doing painting job.
3 # Remove the Fixtures and Fix Holes
There are so many weird cabinets and hangings that need immediate fixture before you begin with painting. It is very important step otherwise the paint won’t look smooth. You can also patch the holes with spackle.
4 # Mask the Edges Clearly
Once you have done cleaning and fixed the holes, it’s time to mask the edges with the help of masking tape. You can apply this tape at the top of the wall or tympanum. Make sure that the edges should be clean and straight so that edges paint would look even. Any kinks in the tape can give a rough look to the ceilings. You should also mask the edges of skylight in the ceiling of the room.
5 # Cut in The Paint Can
After masking the edges, open the can of paint to start painting the ceiling. For cutting, you can use a flat head screwdriver to hold up the lid. Be careful, that it does not fall. You can use the paint cutting tool to paint the edges of the ceiling where it meets the wall. No need to tape off anything or dip, wipe and paint with a brush. Being said that, you can also paint pretty much far as your arm can reach before you have to move your ladder from one place to another.
6 # Mix the Primer with Paint
In the very next step, you can immerse the tip of the cutting tool into your paint or primer. You need to hold the trigger with your thumb and draw yellow plunger on the end away from the handle. Release the trigger first and then release plunger. Press the trigger twice or thrice to get the paint flowing through the pad.
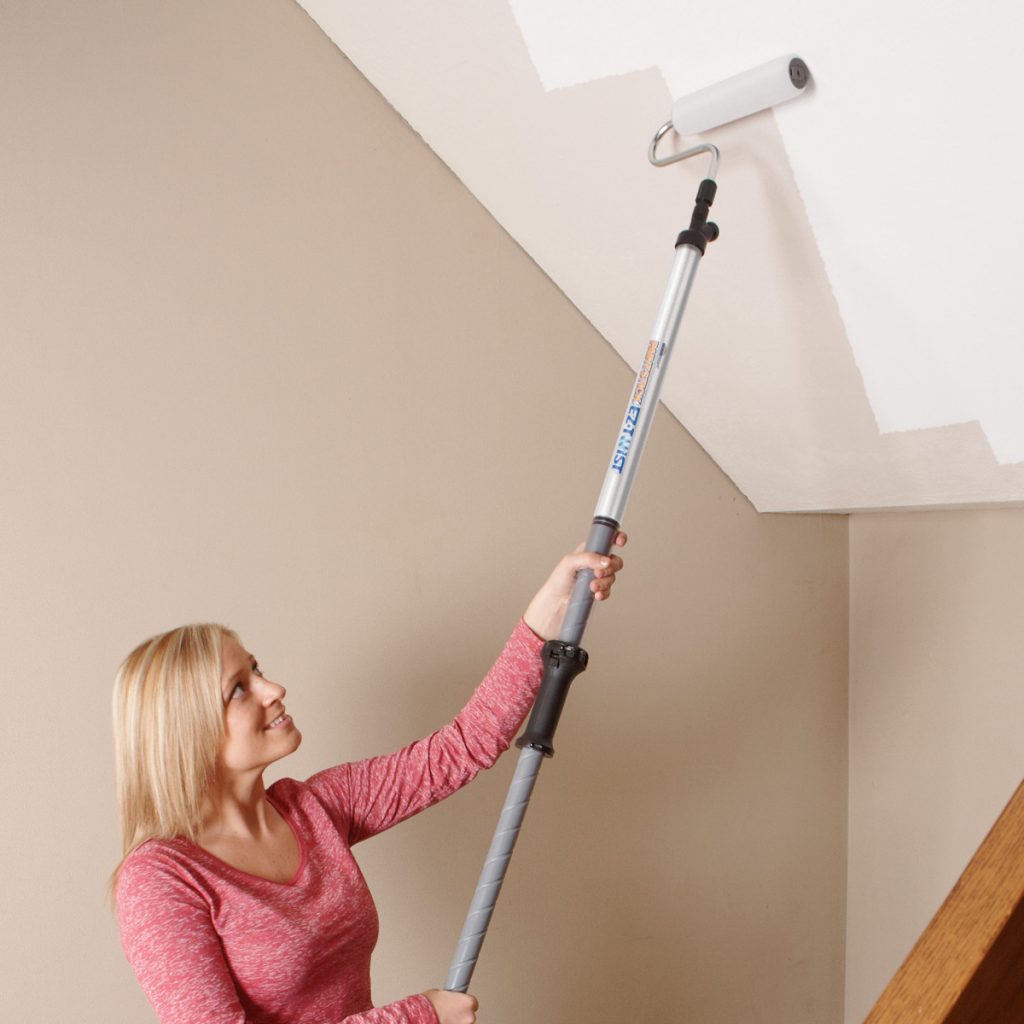
7 # Roll on With Roller
Roller is the most common tool used by the painters for interior painting services. It gives the fine and clean look to the paint. So, pick the roller and roll it on ceiling until the paint runs smoothly on the ceilings and walls. Once the paint becomes smooth, roll it or twist it to dispense the paint directly into roller.
8 # Wrap Up and Clean the Space
Once you are done with the painting job, clear all the things away. Clean the brushes, rollers or a paint tray with a natural soap or detergent. Clean the spillage with a damp cloth, then collect the paint cans and all tools and remove from the room. After that remove the dust sheet and wait for the paint to dry. And just have a good look at your DIY work.
If you want the interior and exterior house painters to take headache for you, then get in touch with the Cape Cod house painters. They have a team of professional designers and painters who can add spark to the color scheme of your home with tremendous ideas. They’ll complete your project within the predefined time and on budget. Yes, it’s because painting becomes interesting when it becomes timeless.
Their highly-experienced painters have all these tools and equipment to paint your home. If you want to save budget on purchasing paint, painting tools or handle all other expenses by yourself, then leave it to these interior house painters. Their performance will make you happy and satisfied that you might not have achieved from your painter before.
If you have any questions about painting the ceilings, please let us know in the comments. We are always there to help you as much as we can.