
During the last years, laminate floors have positioned themselves in the market as an excellent alternative in terms of interior design and decoration. They are quite resistant, do not attract termites, their colors are permanent and there are different prices depending on their design and material. But, above all, they are easy and quick to install.
To install a laminate floor it is not necessary to take special courses or have specialized knowledge. Simply follow our instruction and apply it for your home. Or you can also hire a laminate floor fitters to do it. So let’s get started.
Tools and Materials Needed for the
Installation of a Laminate Floor:-
To execute this task we require the following materials and tools:
1. Insulation material: it should be placed between the surface and the laminated floor, in order to reduce vibrations and the sound of the steps and impacts. In general, they are made of polyethylene or neoprene, but they can also be marketed in other materials, such as plastic or cork.
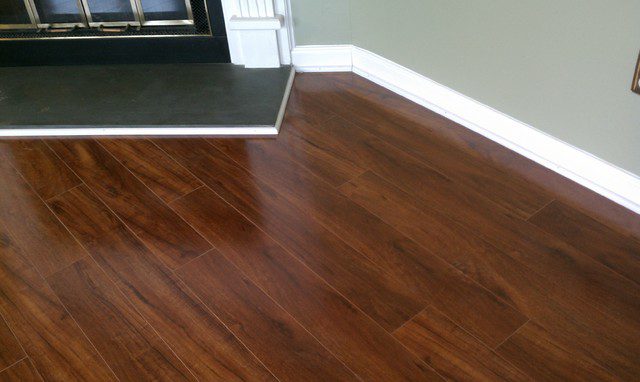
2. Skirting: also known as zoclo, it is the piece of wood or ceramic and that is placed at the base of the interior walls of a building to protect from blows. In the case of the laminated floor, it fulfills an invaluable aesthetic function since it covers the space that remains between the wall and the edges of the plates.
3. Measuring tape
4. Cutting saw
5. Wooden brush
6. Adhesive for the baseboard
7. Pencil to mark
8. Rubber mallet
9. Rubber hammer
Of course, we must have the laminate floor to install, in the amount of square meters equivalent to the area where we are going to carry out the work, being recommended to consider between 10 to 15% extra to be sure.

Recommendations Prior to Installation:-
1. It is preferable that the floor on which the installation is to be made is waterproofed.
2. The area where we are going to perform the installation must be completely unoccupied. In addition, we must remove the old zoclos and the doors.
3. It is not superfluous to place, it is horizontally. The laminated floor packages in the spaces to be intervened, at least during 48 hours prior to start of the work. In this way, we ensure that acclimatization of the materials and avoid delays or contractions after the installation.
Step 1: Prepare the surface
The surface which we are going to develop the installation must be complete since any irregularity or protrusion can affect the stability of the laminate.
Surface must be completely free of dirt and dust. Therefore, we must take the broom or the vacuum cleaner and make sure to leave it completely clean and dry.
Step 2: Place the insulation

We must unroll the insulation along the space where we are going to install the laminate floor. Then we cut the excess material with the tape. We will proceed to join the different pieces of the same and then it will be necessary to glue the edges of the surface.
Step 3: Install the laminate next to
the door frame
Generally, in this step, we have to cut the base of the door frame to fit the piece of the new floor. Therefore, we have to place one of the pieces of laminate next to the frame, measure the height, mark with the pencil and pass the saw carefully. We must be as precise as possible so that the union is imperceptible to the naked eye.
Step 4: Place the first row of the
laminate floor
Before starting to properly install the floor, we must choose the orientation of the pieces according to the visual effect. Once the decision has been made, we begin the placement by the most visible corner of the intervened room, until we reach the end of the row where we will have to measure the piece and cut it to fill the missing gap.
If the last piece is too small, it may be better to start the placement from the center of the row to its sides, so that the corner pieces look better aesthetically.
Note: Laminate floors are also known as floating floors, because, regardless of the joint system used between the pieces, this floor is not glued or nailed to the subfloor. If we do it, it does not work. Therefore, to allow the material to expand freely, it is important that we leave between 8 and 10 mm. of space around the perimeter. If a single piece touches the wall installation will inevitably rise.

Step 5: Continue with the placement
of the other rows
Laminate floors have two methods of joining pieces:
Connections hooked: one panel slides inside another with the help of a mallet to hit or a rubber hammer.
Bonding joints: this system is common in tongue and groove floors. Basically, the pieces are glued and hammered smoothly in their place, to later finish sticking them with special presses.
The simplest installation method is that of hooked joints since to place the next row we just have to fit the pieces and apply a few strokes. However, the bonding method does not present much difficulty either, although it is a bit. In any case, the important thing when placing the pieces is that we approach each row at the opposite corner from the one where we started the row immediately. Applying the same logic that to use when we build a brick wall. In this way, the joints are distributed and we guarantee greater adjustment between the different pieces.
As in the first row of laminate, we will have to cut the pieces of the corners to fill the gap of the surface with a piece to measure.
Step 6: Place the last row
To place the last row of the laminate we must cut the pieces by the long side, in order to cover the surface perfectly. This will take a little more time and work than the cuts made so far to fill the ends.

Step 7: Install the baseboard or
skirting board
This procedure is very simple. The first thing we have to do is measure the horizontal length of each of the walls.
Then, we measure the zoclos, we mark with the pencil and we cut with precision. We apply adhesive for baseboards, making sure it covers perfectly the edges of the laminate floor.
At this point, it is recommended that we start with the doors. Thus, the joints will be in the corners, much less visible to the naked eye.
Step 8: Replace the doors
Ready! The floor is finished. Now we just need to reinstall the doors in the frames. The safest thing is that we have to brush it to fit the new height of the floor, but with a sharp brush the task will not take too long.
The laminate floor you can start using immediately after finishing your installation. That is why, when finishing the works, we will be able to accommodate the furniture again and use the spaces of our home again.